Premium subscription - Admin Dashboard - Reading sessions
Understanding reading sessions
Reading sessions can be done in class, or set as homework tasks for students. Reading sessions allow teachers to assign set eBooks to for guided reading groups or individual students to be read via their eReaders.
The process is broken down below:
1. A teacher logs into the teacher dashboard on the web to set up a reading session.
2. This session automatically appears on the eReader of the teachers and students who have been added to the session, on the start date selected.
3. The student opens the reading session, either in class or at home, and the history of how they interact with the book is recorded.
4. The reading session will disappear from the iPad and web app on the end date selected.
Creating a reading session
Select SESSIONS on the sidebar menu to begin. If this is the first time you’ve created a session, you’ll be prompted to create one. If it’s not your first time, you’ll see a page similar to below. Select CREATE A READING SESSION to begin.
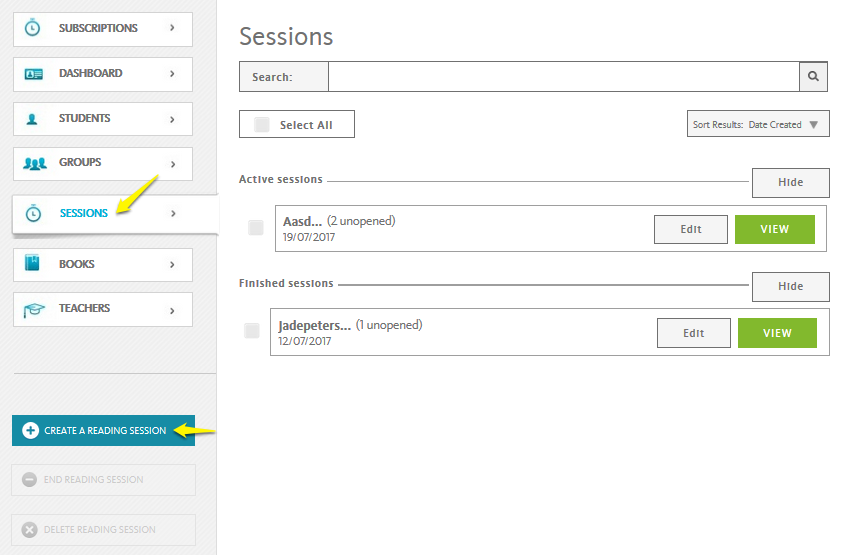
From the Create a reading session page, you can:-
● Add students, groups and teachers
● Attach books
● Select guided (audio disabled) or independent reading modes
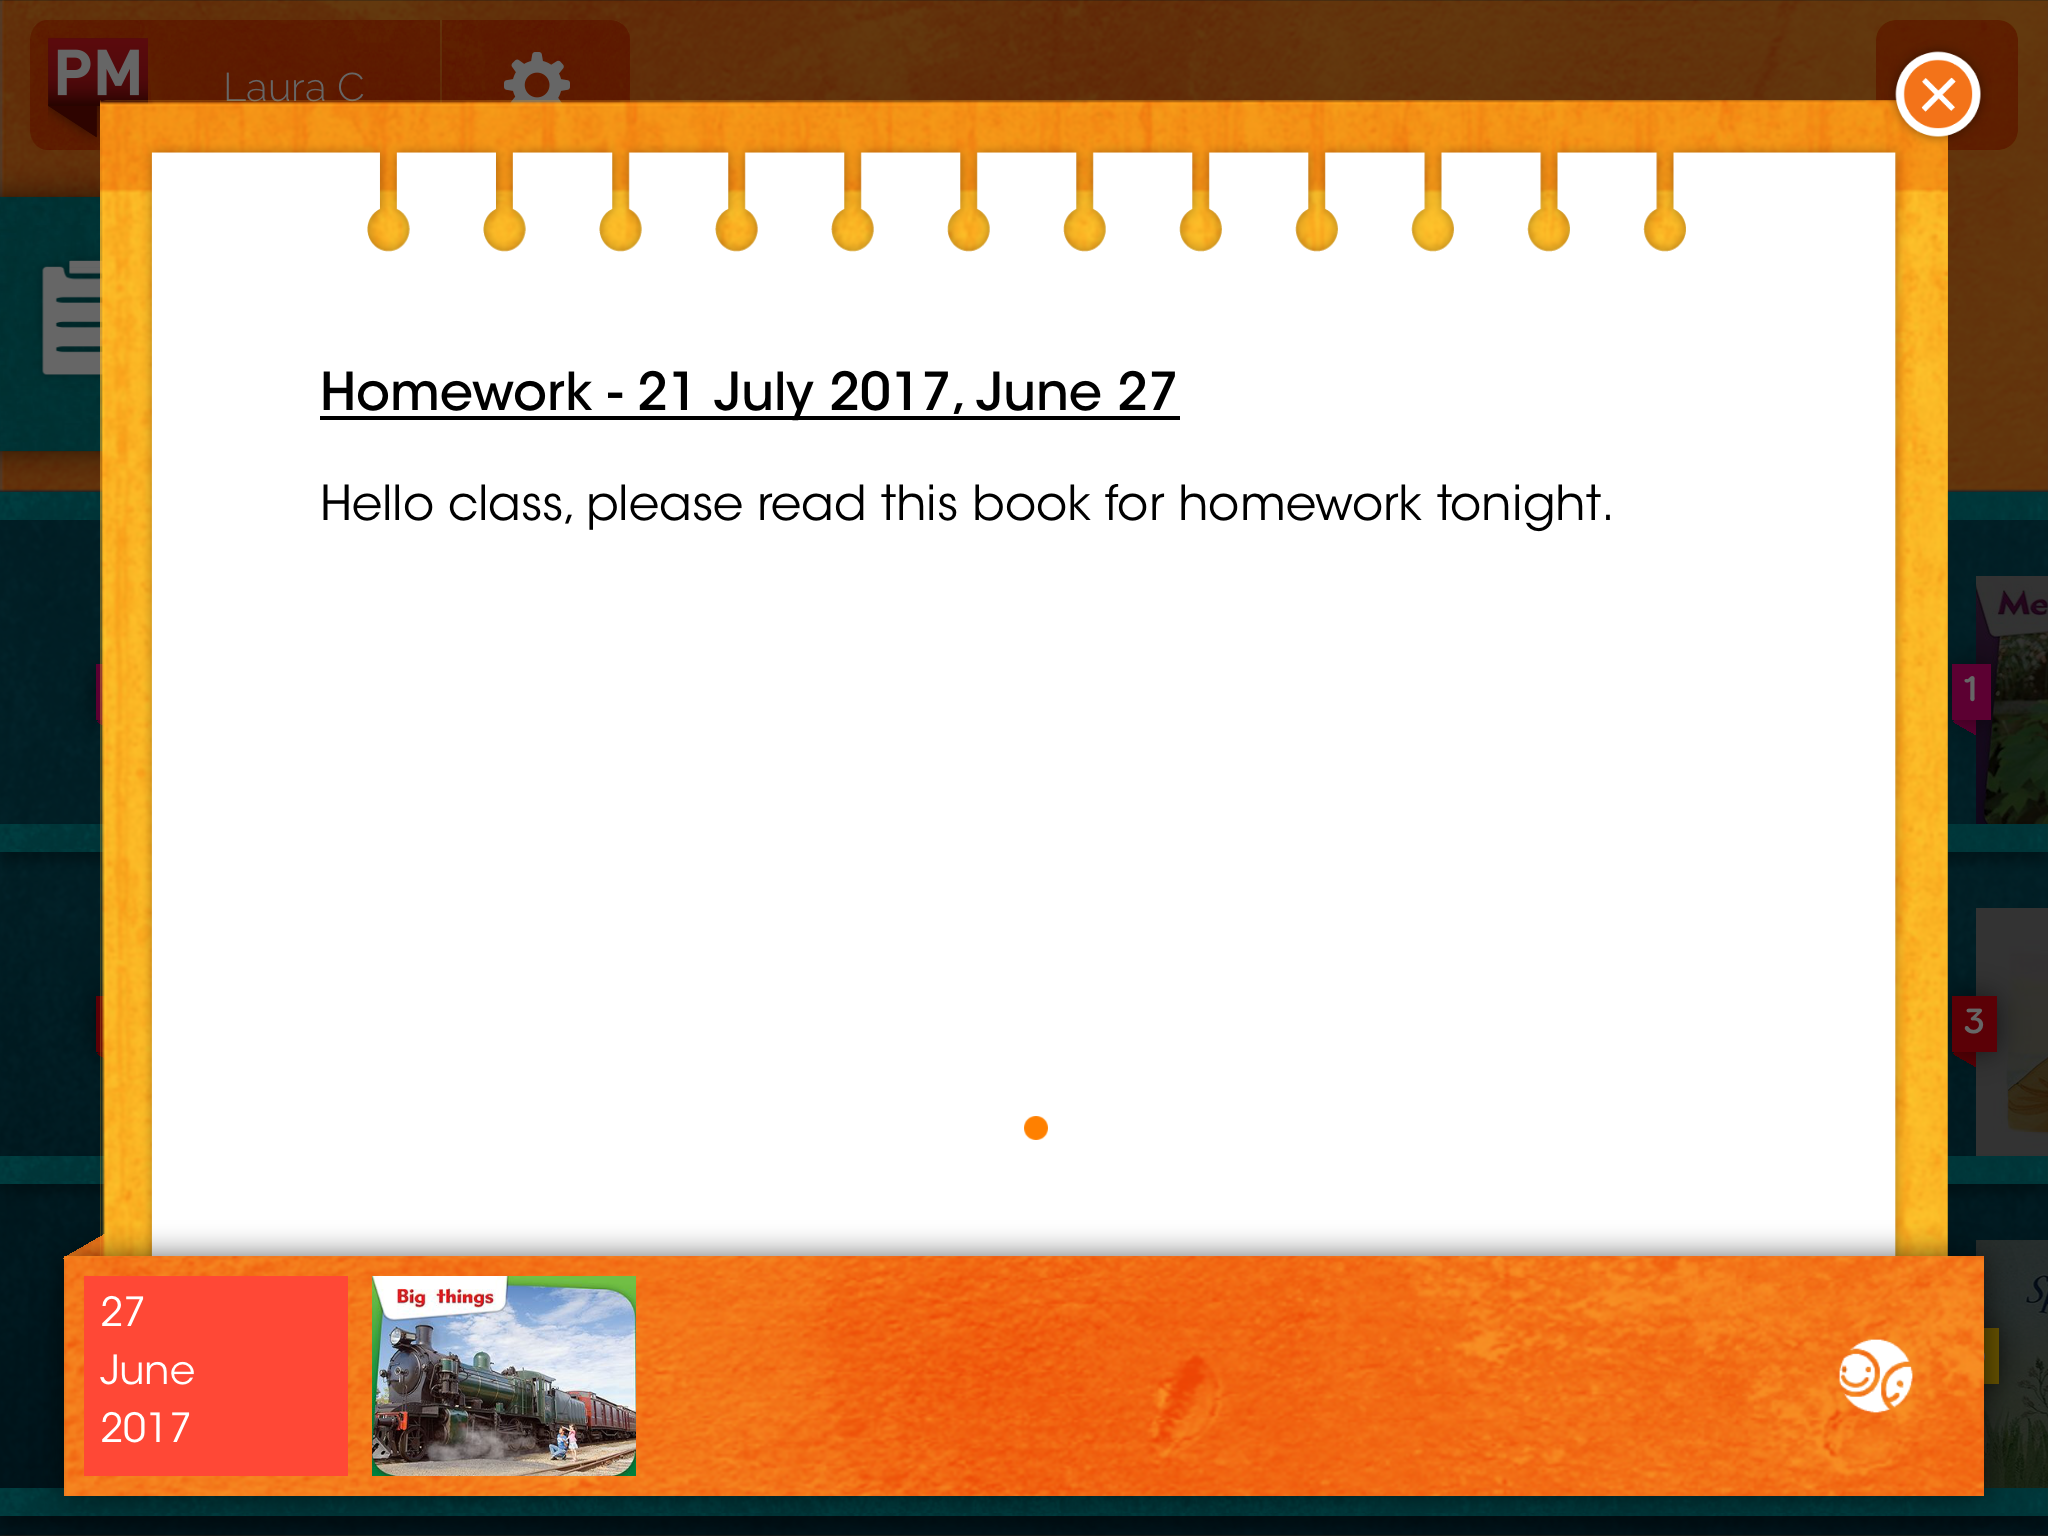
● Add notes (instructions for the class that will pop up when a reading session is first opened)
● Add a session name
● Select dates the reading session will be available.
Adding students, groups and teachers
Before adding students, groups or teachers to a reading session, they must first be set up on your subscription. See the relevant other help sections about these subjects.
The process for adding students, groups and teachers is the same. The instructions below refer specifically to adding students, however it’s the same process for all three.
Select the ADD STUDENTS button to select the students you wish to include in the session.
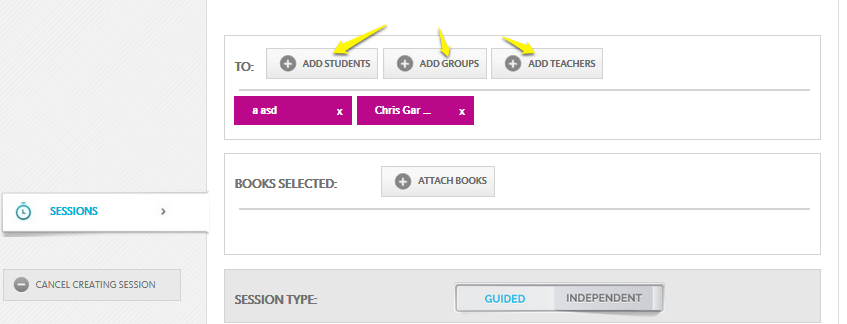
On the Add students page, select the green ADD button next to a student’s name to select them. Once a student has been selected, their name will appear in a purple box at the top of the page.
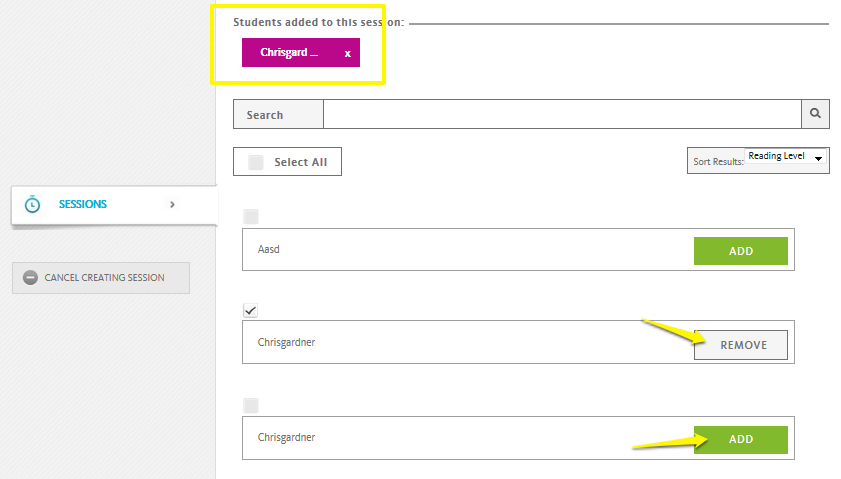
If you accidentally select the wrong student, select the grey REMOVE button next to their name.
To select all the students on your subscription, select Select All.
Make sure to scroll down and select OK to confirm, and head back to the Create a session page.
Note: Please follow the above steps for adding teachers and groups.
Attaching books
Note: Every reading session created requires at least one book to be attached.
Select the ATTACH BOOKS button on your reading session
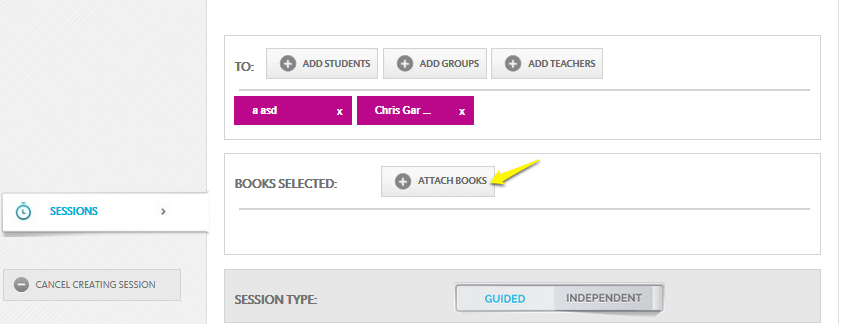
On this next page, you’ll see the full list of the titles.
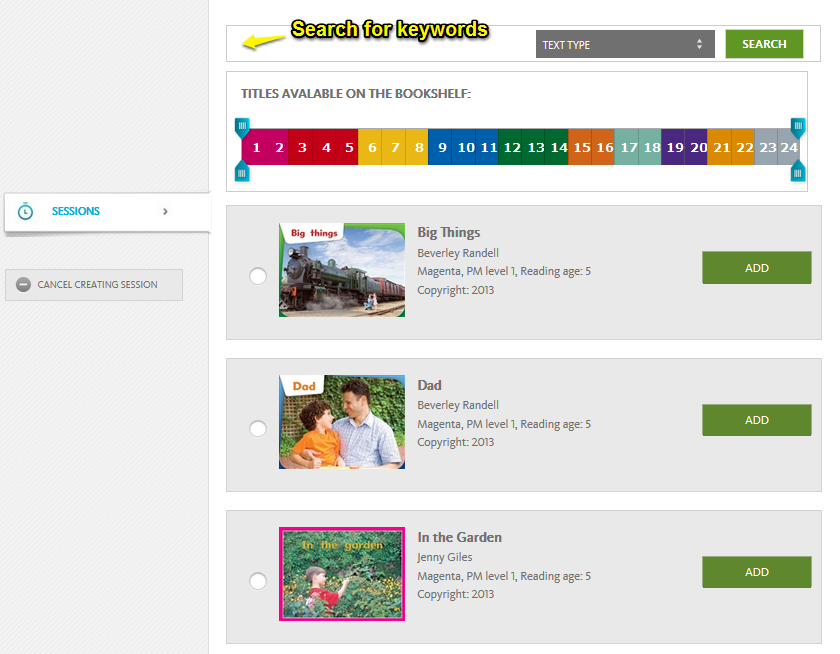
There are a few ways to search for books:
1. Search for keywords using the search bar.
2. Browse through titles by scrolling down the page and using the navigation bar.
3. Drag the blue arrows on the coloured slider to modify the level of the book titles shown.
Once you’ve found the book or books you wish to add to the session, select the green ADD button next to the title.
Scroll to the bottom of the page and select the blue OK button once you’re happy with the book selection.
Reading sessions on the eReader app
When a reading session is created, it will automatically appear on the eReader of the teachers and students who have been added to the session, on the start date selected. The reading session will disappear from the eReader on the end date selected.
The screenshot below illustrates where a reading session will appear on the eReader:
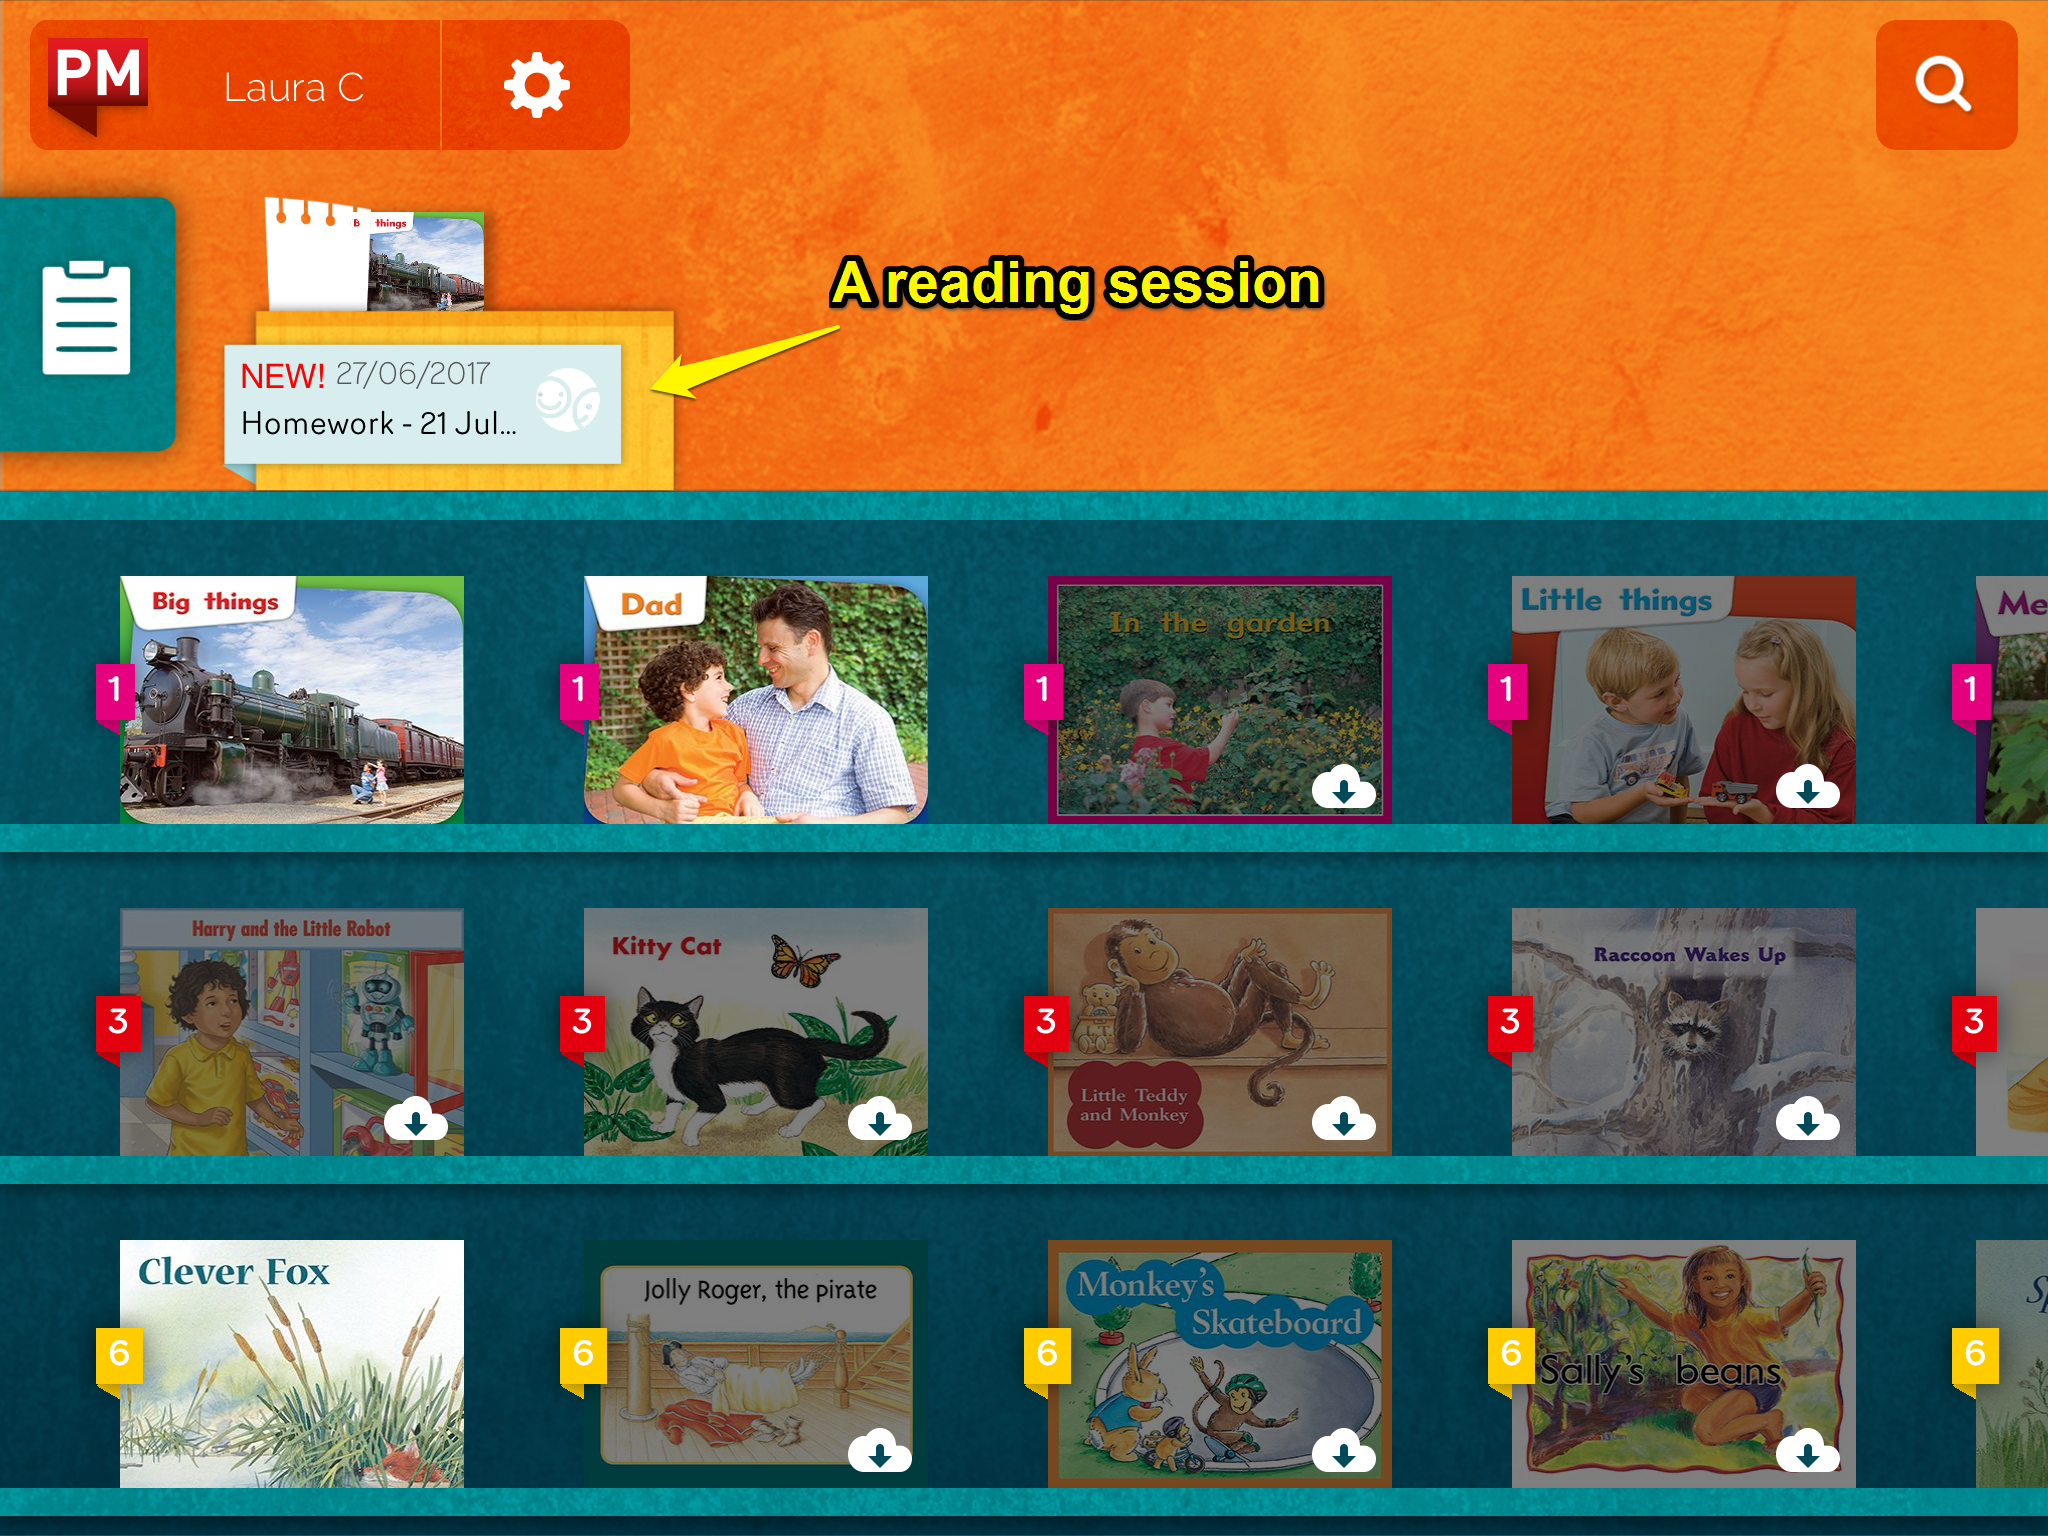
The Notes section is for typing a message to your students. The note will appear once a reading session opens on the web or iPad app. It looks similar to the screenshot below:
Once a student taps or clicks on the assigned book’s cover, the reading session will begin.
Modifying a reading session
Modifying a reading session is a similar process to creating one. You can modify active or finished sessions, and choose to extend or end sessions.
Select SESSIONS to see an overview of all current active and finished sessions. From this page, select Edit next to the session you wish to modify.
On the Edit session page, you can:-
• Add or remove students, groups and teachers
• Attach or remove books
• Modify the session type
• Update homework notes
• Rename the session
• Extend or end a session (by modifying the session dates)
Note: If you’re modifying the books, students, teachers or groups, make sure to do this before making changes to the notes, session name or session dates, as the page will refresh without auto saving.
Viewing the history of a session
Select SESSIONS to see an overview of all current active and finished sessions. From this page, select VIEW to see the history of the session.
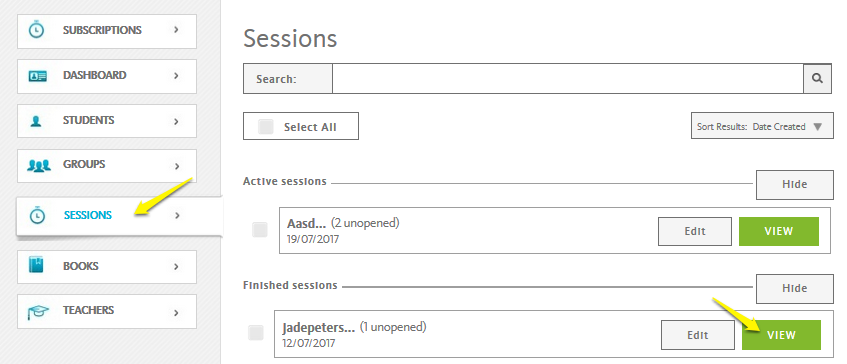
On the View session page, you can view:-
• The name of the session
• The dates the session was active
• The names of the students that opened (or didn’t open) the session
• The notes
• The books included in the session
• A timeline breakdown of the time spent reading the books, the words saved and the students who participated.
From this page you can also choose to extend or end the current session by modifying the date field next to This session will end: or tapping or clicking the blue END SESSION button.